
We have a lovely little backyard that I never take for granted because when you live in a city like San Francisco where the homes butt up right against each other and your front door opens pretty much directly onto the sidewalk, having a little patch of earth in the back of your home that you can enjoy is really a blessing. Lately, I’ve been wanting to add a bit of DIY outdoor lighting to our little patch of earth.
When the sun goes down our backyard can get pretty dark and although we have electric lights we can turn on, I love the look and feel of candlelight. Awhile back, I decided to upcycle some of our empty cans into DIY tin can lanterns. I’ve always liked them in other people’s yards, but wasn’t sure how to make holes in cans without crushing the cans. Turns out it’s actually pretty easy and kind of a stress reliever, especially if you find yourself pissed off at ICE. IYKYK.

ALSO READ: DIY: Sugar Skull Milk Jug
Let me show you how I made mine, in case you’d like to make some yourself while symbolically crushing ICE. Again, IYKYK.

What you’ll need to make your DIY tin can lanterns:
- Empty clean tin cans
- A hammer
- A nail
- A towel
- Spray paint (optional)
- Tea lights
Directions:
- Get together as many tin cans as you like. Make sure you have removed the labels and cleaned all the gunk off of them inside and out.
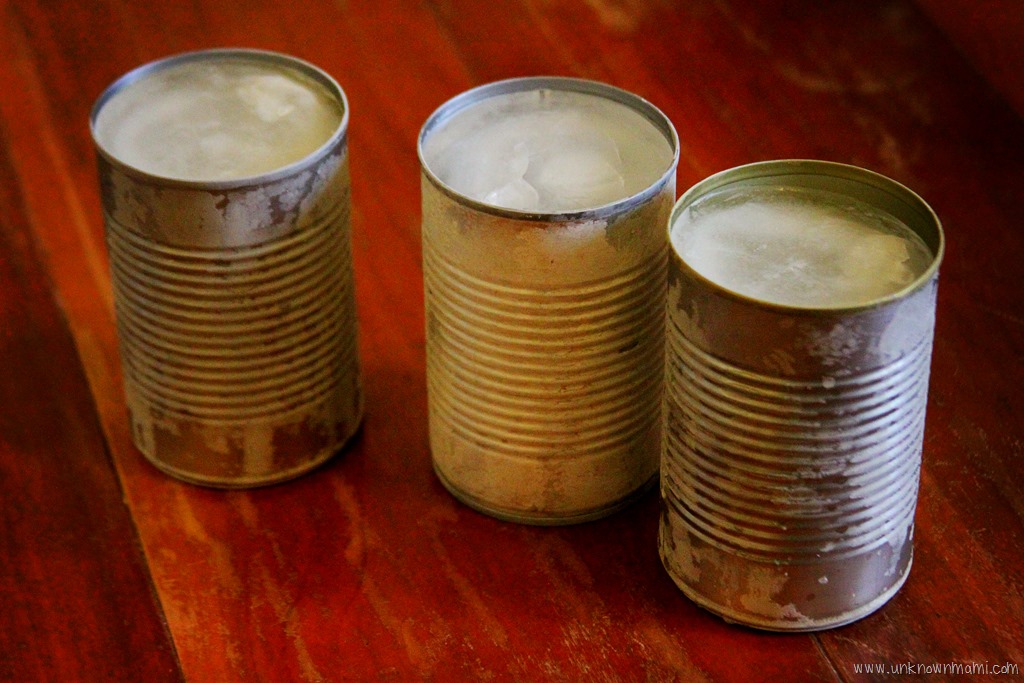
- Fill each can with about two inches of water and put them in the freezer until those two inches are frozen solid.*
- Remove the cans from the freezer and then fill them the most of the way up with water, put them back in the freezer until the whole thing is frozen solid. The frozen ice keeps the cans from getting misshapen when you hammer holes into them.
*The reason you want to do the water freezing in two steps is that if you fill your cans with water all at once and freeze the, the bottoms of your cans may pop out or gets warped. By freezing in two steps, your cans retain their shape.

- Once your cans are filled with solid water (i.e. ice), take them out and work on a surface that you’ve laid a towel on. You can use the towel to protect whatever surface you are working on and also to help you hold the very cold cans in place when you start hammering.
- You can use a Sharpie pen to draw a pattern on your cans or you can free-hand it.
- Start hammering. Place the nail on one of your cans and give it a forceful tap with your hammer, if the nail doesn’t go through the tin on the first tap, give it another until you can see that you’ve made a hole. I tried three different sizes of nails and found that the biggest size worked best and needed the least amount of effort to puncture holes in the cans.
- Once you’ve let the ice melt from the cans, you can put tea lights in them immediately or you can gussy them up a bit with paint.
I’m a sucker for spray paint so, I painted my cans with a couple of coats flat black and then added a few layers of glitter on top. Here they are in daylight:

ALSO READ: DIY Chicken Wire Frame
It’s hard to appreciate the glitter in the picture, but in person it is all kinds of sparkly wonderful, I promise. I set the tin can lanterns up on our wooden fence with veladoras interspersed between them and this is the finished result:

I absolutely love the way it all looks together! How’s that for DIY outdoor lighting? So inexpensive and easy to make and so beautiful to look at.
Love these!
Thank you, I’m pretty enamored of them right now.
Nice. I think I found something I can pass on to my teachers who work in Honduras. Easy and fun. And since lights are never a sure bet in a developing country. there are useful, too.
What a cool idea! They are so pretty.